Sunday, March 13, 2011

Z Palette


Favorite Things Friday: Z Palette


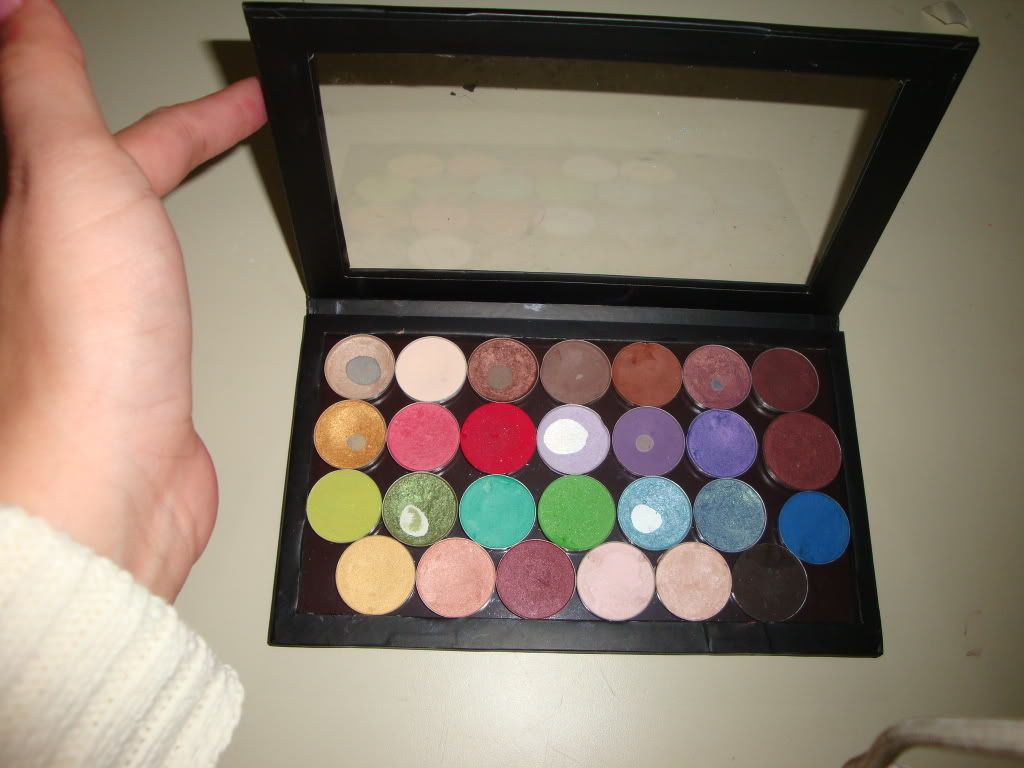
Ever since I discovered the Z Palette, my life has been much more organized. I am super OCD when it comes to my makeup, since I am a makeup artist. I strive to keep my kit clean and organized.


The Z Palette is amazing! I was able to fit 27 MAC eye shadows in one Z Palette!  Taking the eye shadows out of the pots have saved me so much space! The eye shadows I had were not the pro store ones that have a magnet and go in a palette, these are the regular ones you buy at any MAC store. They come in a bulky pot and they take up a lot of space in your makeup case. I even bought a Z Palette for my personal everyday makeup. No more looking through a bag of eye shadows to find the right one.


Taking the eye shadows out of the pots is not as difficult as you may think. Just don't do what I've done in the past and try to rip them out without melting the glue first. If you do this, I will show you how to fix a broken eye shadow and properly  de-pot it.


Items you will need:


1. Flat Iron (one that is not super expensive and you don't mind getting melted plastic on.)
2. Tweezers or forceps 
3.Ttiny screwdriver or something else you can pry the eye shadow with
4. Hand towel ( so you don't burn your hands)
5. Somewhere to place the de-potted eye shadows on while they cool


Step 1
Place eye shadow on the bottom plate of your Flat Iron. Leave there for about a minute (until the glue holding the shadow down had melted a bit)
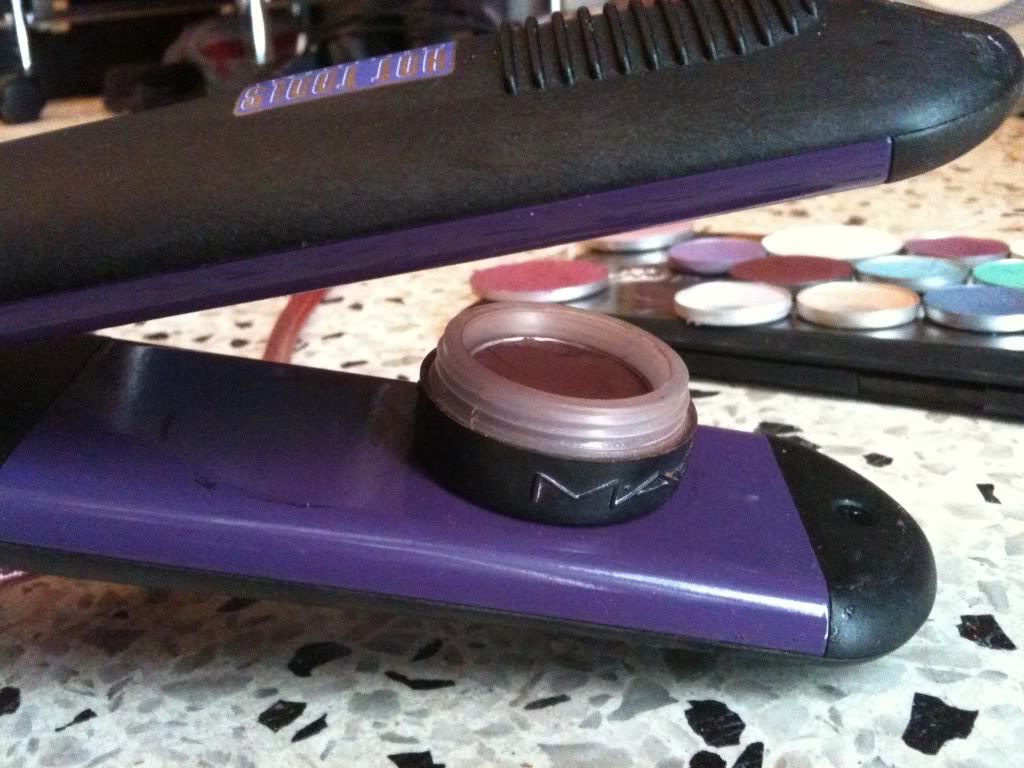
Step 2
Remove Eye shadow from Flat Iron with Forceps or tweezers ( can get a bit hot)
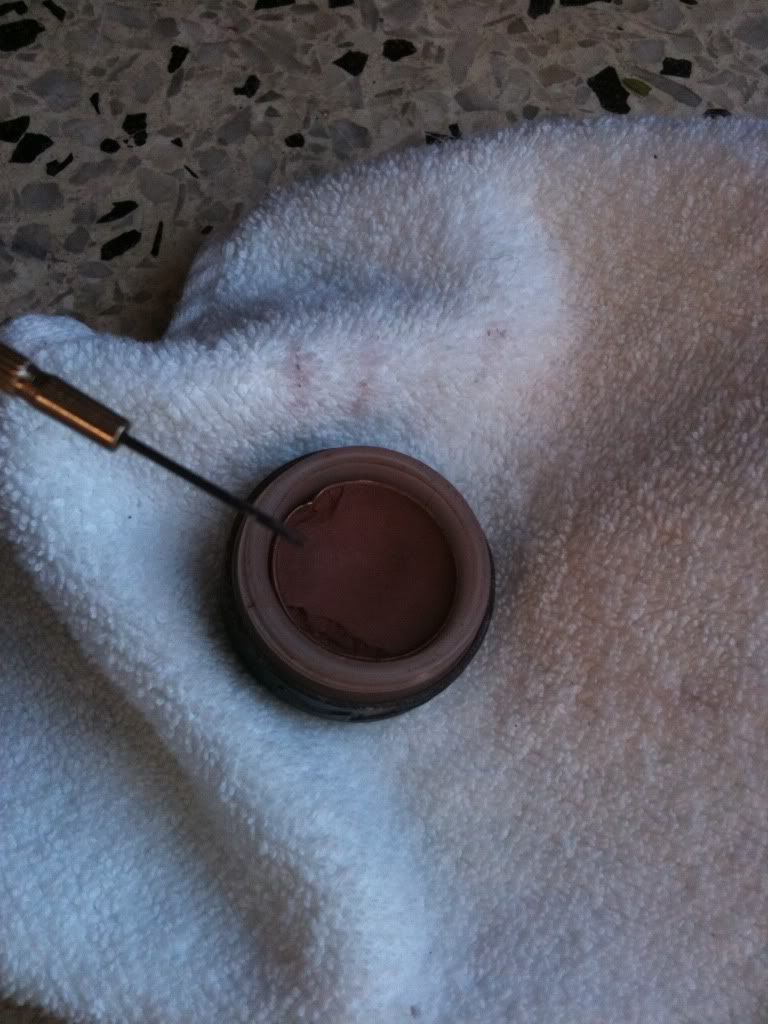

Step 3
Lift the eye shadow up and away from the pot with your tiny screwdriver or tweezers.


Step 4
Let cool on a safe surface


Step 5
Clean off any remaining glue from the back with Acetone or Alcohol


Step 6
Apply Magnet ( you can buy them on Z Palette website) to back of eye shadow


Step 7
Place in Z Palette and VOILA!


You can buy a Z palette at www.Zpalette.com


O-GLOSS INTUITIVE LIP GLOSS


O-GLOSS INTUITIVE LIP GLOSS

I commented on a friends amazing lip color the other night, and I needed to know what she was wearing. Turns out it's a new lipgloss from Smashbox! It's called O-GLOSS. It's an intuitive lip gloss that goes on clear and turns into your very own shade of pink. I had a few friends put it on and everyone's lips turned out a different shade of pink.

O-GLOSS has Goji Berry-C Complex™ and ginkgo biloba, pomegranate seed antioxidants, revitalizing marine botanicals and moisturizing avocado oil that give you shiny kissable lips. And it's not sticky at all like some lip glosses.

O-GLOSS is the Winner of Allure Magazine Reader's Choice Award for Most Innovative Product, and two-time Best of Sephora Award Nominee for Best Lip Gloss and Best Beauty Innovation.

Also try O-GLOW it's a creme blush that turns your cheeks the shade you blush naturally!

My first full head prosthetic!

My first full head prosthetic!


I decided to make an homage to the movie "Tank girl" and make a female Ripper. It's a kangaroo. Here are the steps I took to make it.


1. Full head life cast in Body Double.


2. Ultracal 30 to make positive of life cast


3. Begin sculpting in clean clay


4. Cast finished sculpture into a mold


5. Fill finished mold with prosthetic grade latex foam.


6. Paint with PAX


7. Punch in whiskers


8. Apply to model


9 Blend eye and mouth  piece to model


10. Add finishing makeup touches


11. Add Wig and clothes and VOILA!


For pictures of the full process from sculpture to painting check out my website http://www.nancymendoza.com/Kangaroo.html

CSI HEAD Project


This is what I've been working on for the past few weeks. Our teacher Mike McCracken taught us all about the process that goes into creating a Silicone CSI type body. My group worked really hard on this project for 1 month. Everything from casting the boys face to sculpting the gore out of clay and casting that into a Silicone form. I learned alot about myself during this class. I love sculpting! I really got good at creating finger prints and I really love punching hair.


I can't wait to do this again and maybe see it one day in a movie or TV show.


Thank you Mike McCracken for being such an amazing teacher and mentor. I hope I can work right next to you one day.


Check out my website for pictures of every stage of this project.
http://www.nancymendoza.com/csihead.html


Valli O'Reilly- Makeup Designer for Alice In Wonderland


Meeting Valli O'Reilly was amazing! She has such a calm spirit and great aura. I felt a whole lot less nervous speaking to her than I thought I would. Then again, I have met tons of famous people since I was little, so I usually act pretty normal. This was way less nerve racking than meeting Gavin Rossdale when I was 13.


Valli O'Reilly showed us how she did the Red Queen's heart shaped lips for the new Alice in Wonderland movie. She showed us the actual stencil she used on Helena Bonham Carter. It was unreal.


I would love to work with her in the future. I just need to rack up some film time so that I can join the Union ASAP! So if you need a makeup artist for your next film ( a non union film) call me! I am willing to travel!

My first MUAtv makeup experience!


Yesterday, I was given the opportunity to do makeup for Makeup Artists Television. It was for an interview between Joe Blasco and the new Joe Blasco cosmetics distributors in Holland. I was assigned to do Hair and Makeup for the owner of SANDRA HAIR AND BEAUTY CENTRE. She is beautiful and it was a great pleasure to work with her. She has gorgeous hair and the cutest nails.


The interview will air on MUAtv.com . I will let everyone know when it goes online.


Mr.Blasco showed us the whole process that goes into filming an internet tv show. Everything from makeup, lighting and filming. I learned so much in just a few hours. I can't wait to do it all again tonight.


Many Thanks to Mr. Blasco and everyone at MUAtv.com for giving me this amazing opportunity!


What is MUAtv.com?


THE ONLY LIVE STREAMING WEBCAST FOR PROFESSIONAL MAKE-UP ARTISTS, MAKE-UP SCHOOL STUDENTS AND COSMETICS RETAILERS.  THE FIRST AND ONLY WEBCAST FEATURING PRO MAKE UP AND BEAUTY KNOWLEDGE, NEWS AND EXCLUSIVE INTERVIEWS WITH AWARD WINNING ARTISTS 24/7.


Learning whisker work with Fred Blau

 I truly enjoyed learning "Whisker Work" from Fred Blau. Mr. Blau is also creator of the special effects makeup line known as Reel Creations .


Fred Blau taught us how to properly lay and style facial hair. It's so much harder than it looks, but I loved learning all about laying a full beard and mustache from crepe wool. We also learned all about styling the facial hair with old style mustache curling irons.


You can see my progress below.


My mustaches need a whole lot of work. But it's cool to know that in a pinch, I can create a full beard and sideburns with crepe wool or human hair. It's not as easy as they make it look. But it's a pretty cool process.  


Me with Fred Blau

The Amazing Kim Greene

As you may have heard on twitter and facebook, I will be working on a zombie movie (a zombie comedy or a zombiedy) shooting in Orlando in the next few months. We were given the script, which I absolutely love.  Kim Greene taught us how to "break down the script" and to be prepared for virtually everything and anything that will happen on a movie set.


(pic) Me with Kim Greene


Kim Greene has worked on so many great movies ( 17 again, Terminator Salvation, Superbad, Anchorman, etc). She has department headed so many movies and we were lucky enough to learn from all her experiences. The information she gave us is invaluable, this kind of thing has never been taught.


I can't wait to begin working on the movie. I have submitted my script breakdown, character makeup breakdown along with the man days form.


Also, don't forget to check out The Kim Greene Line. It's a line of really cool clear makeup bags created by Kim Greene herself. She uses them on set to keep each actors makeup organized. I bought a few to keep my makeup kit organized and even use some for everyday personal makeup use.